How to Create The Front Server Guide
Creating a The Front game server is an easy process that can be done from either a dedicated server or your home computer. Alternatively, you can choose a The Front server host that will fit your needs.
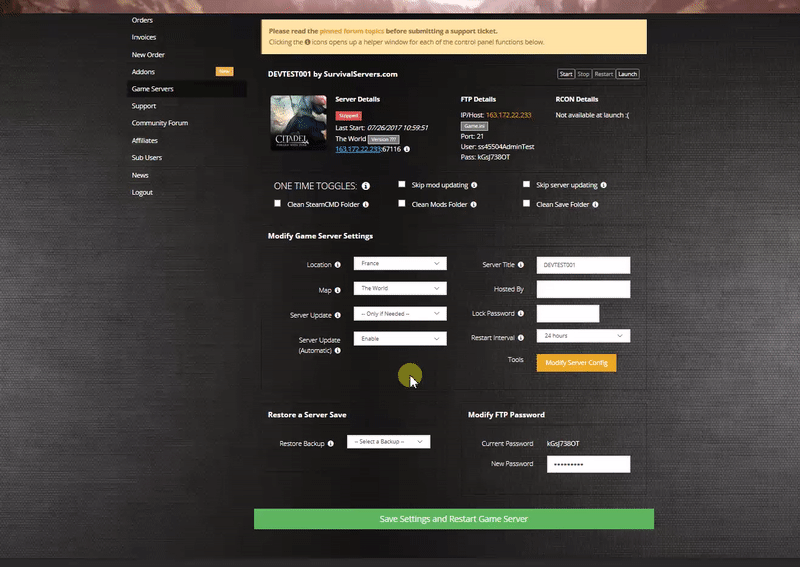
Option #1: Renting The Front server (see example control panel below!)

Option #2: Creating a The Front Server From Your Home Computer or Dedicated Server
Server Requirements
Windows 10/11, Server 2016/2019/2022 & 64-Bit
Quad Core processor (requires up to 2 full cores)
Up to 8GB memory (currently uses around 1GB memory)
4GB disk space (install folder)
Step 1: Fetching Game Server files
The best method to get dedicated server game files is via the dedicated server depot on Steam via SteamCMD.
- Create a folder where you wish to store your The Front game server hosting files
- Inside of the folder, place the newly downloading SteamCMD.exe file
- Create a batch file named SteamCMD.bat
- Place the following code in this batch file:
- @echo off
- start "" steamcmd.exe +login USER PASS +force_install_dir "C:\Some\Path\Where\You\Want\Game\Server\Files\To\Go" +app_update 2612550 validate +quit
- Right-click SteamCMD.bat and Run as Administrator
- Your game server files should be completely downloaded by now
Step 2: Setting up a The Front Dedicated Server
- Create a batch file named The FrontServer.bat in your newly created The Front server folder from step 1
- Place the following code in this batch file:
- start "" "C:\PATH\TO\YOUR\FILES\ProjectWar\Binaries\Win64\TheFrontServer.exe" ProjectWar ProjectWar_Start ?Listen?MaxPlayers=8 -server -game -QueueThreshold=8 -ServerName="YOUR SERVER NAME" -ServerAdminAccounts=STEAM64ID;STEAM64ID;STEAM64ID -log log=log.log -locallogtimes -EnableParallelCharacterMovementTickFunction -EnableParallelCharacterTickFunction -UseDynamicPhysicsScene -OutIPAddress=YOUR_PUBLIC_IP -ServerID=ANY_IDEA -port=PORT-BeaconPort=PORT+1 -QueryPort=PORT+2 -Game.PhysicsVehicle=false -ansimalloc -Game.MaxFrameRate=35 -ShutDownServicePort=PORT+3
Step 3: Configuring your The Front Server
Now comes the fun part, setting up your The Front game server to your liking. There are some launch parameters to be aware of.
-log - Enables logging
There are also a few files that can be configured.
/TheFrontManager/ServerConfig_.ini - modifies the server configuration
[BaseServerConfig]
IsCanMail=1.000000
ServerName="YOUR SERVER NAME"
ServerPassword=
ServerAdminAccounts=STEAM64ID;STEAM64ID;
ServerTitle="A simple description of your server"
PlayerAddExpRate=1
Make sure to modify the following in order to get your game server to work:
ServerName - Changes the host name of your game server
ServerPassword - Enables a password to join
ServerAdminAccounts - Adds Admin users to your server
ServerTitle - Allows you to enter a brief description of your server
PlayerAddExpRate - Edits the Experience gain rate of the server
Step 3: Port Forwarding
Add an incoming rule to your Windows Firewall to allow TCP/UDP port (game port) 15636, (Steam query port) 15637 (or whichever ports you decide to use)
You may additionally need to add a forwarding rule to your network router. You can use PortForward.com to read how to do this.
Location of World Save Data
To locate your save folder, navigate to this folder:
C:\PATH\TO\YOUR\FILES\ProjectWar\Saved\GameStates
There will be four folders and two files, back them all up in order to make a backup.