How to Create a BATTALION 1944 Server Guide
Creating a BATALLION 1944 game server can be done with either a dedicated server or a home computer or hosted and rented from a server provider.
Option #1: Renting a BATALLION 1944 server (see example control panel below!)
Option #2: Creating a BATALLION 1944 Server From Your Home Computer or Dedicated Server
Server Requirements
Windows 7, 8, 8.1, Server 2008, Server 2012 & 64-Bit
Quad Core processor (requires up to 2 full cores)
Up to 16GB memory (currently uses around 6GB memory minimum and up to 15GB of memory for a full server)
2GB disk space (install folder)
Visual C++ Redistributable for Visual Studio 2015
Step 1: Fetching Game Server files from Static Link
Latest server version: 10747
The best method to get game server dedicated hosting files is via Download for Windows or [ Linux Download for Linux]
- Create a folder where you wish to store your BATALLION 1944 game server hosting files
- "C:\battalion1944server"
- Place all of the files in this directory
Step 2: Setting up a BATALLION 1944 Dedicated Server
- Create a batch file named BATALLION1944Server.bat in your newly created folder (Step 1)
- Place the following code in this batch file:
- start "C:\battalion1944server\WindowsServer\Binaries\Win64\BattalionServer-Win64-Shipping.exe" /Game/Maps/Final_Maps/Derailed?Game=/Script/ShooterGame.BombGameMode?listen -broadcastip="<EXTERNAL_IP>" -PORT=<DESIRED_PORT> -QueryPort=<DESIRED_PORT + 3> -log -defgameini="../../../DefaultGame.ini"
- Replace <EXTERNAL_IP> with 0.0.0.0 if you are running on your home PC or your dedicated server IP if on a server
- <DESIRED_PORT> with your desired game port
- <DESIRED_PORT + 3> with your desired game server query port
Step 3: Port Forwarding
Add two incoming rules to your Windows Firewall to allow UDP port <DESIRED_PORT> as well as <DESIRED_PORT + 3> (or whichever port you are using).
You may additionally need to add a forwarding rule to your network router. You can use PortForward.com to read how to do this.
How to Join Your Server (SurvivalServers.com Customers)
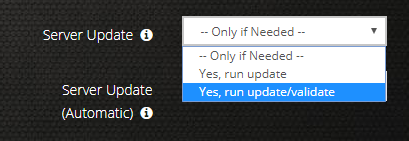
STEP 1: Update your server to the newest BATALLION 1944 version, then click the green update button at the bottom of the panel. * If you are not a Survival Servers customer ask your game server host about this.
METHOD 2, STEP 1: Find your server from the in-game server list!
METHOD 2, STEP 2: Right click Steam in the task bar icons of your PC and select servers as pictured below.
File:Battalion1944s4erverliststep1.png
METHOD 2, STEP 3: Select BATALLION 1944 as your game at the bottom. Join your server!
Configuring your BATALLION 1944 Game Server!
Now comes the fun part, setting up your BATALLION 1944 game server to your liking.
Open up your \WindowsServer\DefaultGame.ini so you can edit some various lines
Under the heading
[/Script/ShooterGame.BattalionGameMode]
in the DefaultGame.ini supplied you will see the following:
| +ModeRotation=/Script/ShooterGame.TDMGameMode |
| +ModeRotation=/Script/ShooterGame.DOMGameMode |
| +ModeRotation=/Script/ShooterGame.CTFGameMode |
| +ModeRotation=/Script/ShooterGame.BombGameMode |
| +MapRotation=Coastal |
| +MapRotation=Derailed |
| +MapRotation=Liberation |
| +MapRotation=Manorhouse_V1 |
| +MapRotation=Manorhouse_V2 |
| +MapRotation=Battery |
| +MapRotation=Outpost |
Add or remove maps/modes in this list to control your rotations. To have a random mix of maps and modes set the following variable to True: RandomMapRotationEnabled and it will choose a random mode every map change.
I Want the Aim Map!
Cool! Just add the following to the MapRotation:
| +MapRotation=AimMap_01 |
Server + Game Configuration
Some basics customization:
In the DefaultGame.ini search for the heading
[/Script/ShooterGame.BattalionGameMode]
and you should see something like:
| ServerName= | Change this to the name you want players to see your server as |
| Password= | Add a password here if you want |
| TeamNames="ALLIES" | Change the name of Team 1 |
| TeamNames="AXIS" | Change the name of Team 2 |
| PlayMode=Arcade | Set the play style of the server. Most admins will want "Arcade", however "Comp" and "Unranked" are also available. These configurations mirror the matchmaking options. |
| StartType=ReadyUp | Here you set how the server will start. You can choose between: "ReadyUp" requires all players to ready up before the game begins, "PlayerCount" waits until the number of players is bigger or equal to the "RequiredPlayers" config variable, and "Skip" which will start the server immediately. |
There are quite a few variables to choose from and we will expand our documentation on all of them in the coming weeks. Each mode has its own section in the DefaultGame.ini and hopefully most of them are self explanatory.
Tools
- Coming soon.
Share your opinion


