Thanks for visiting our wiki! Click here to order your own game server at SurvivalServers.com
Arma Reforger Mod Install Guide
Jump to navigation
Jump to search
Share your opinion
Mod Installation
Mods can be installed from the Steam Workshop using FTP.
Mods
- Make sure your sever is stopped.
- Launch Arma Reforger in steam and head into the workshop tab in the main menu.
- Once in there select the mods you wish to have in your server by clicking on them to install.
- Open up your servers FTP client and head into the admin folder. Once in there edit the serverConfig.json file with notepad++
- Look for the following section: "mods": []
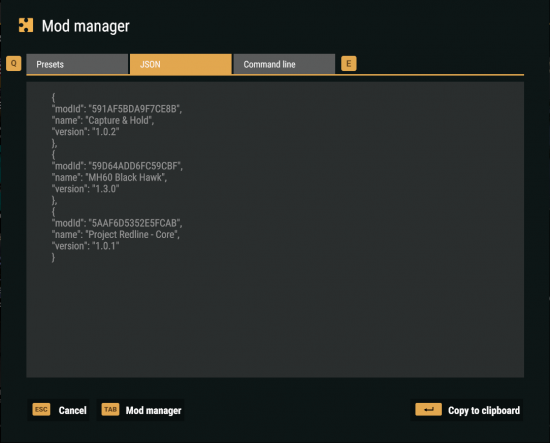
- Head back into your game and back into the workshop menu. Click the puzzle icon in the top right corner.
- Click the Jason tab and copy the data to your clipboard
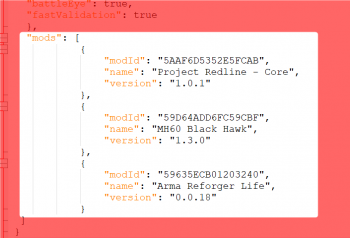
- Insert the copied code into the "mods": [ your code ] section of your config.
- The section should look like this after you are done:
- Now that you have that file setup.
- Save the file and upload it back into the server.
- Start your server up and the mods should be active now.
Mods Mission Installs
If you are wishing to install mod missions such as capture & hold. You will also need to find out the
mission name and linking.
- Once you have the mission "scenarioId". Head into your serverConfig.json
- Replace the default id "{ECC61978EDCC2B5A}Missions/23_Campaign.conf" with your new one.
- Save and re upload to your server.
- The new mission set is now installed.
Share your opinion

